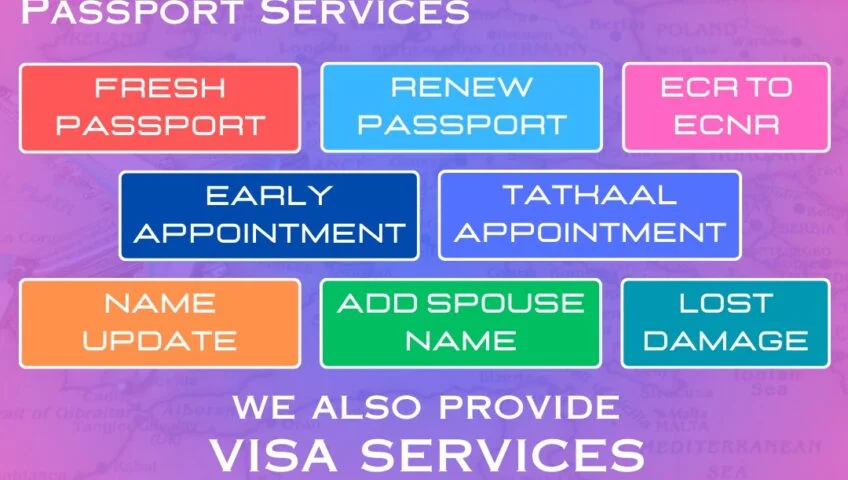
The Fast Lane to Your Passport: How to Secure an Early Appointment and Navigate the Entire Process
A passport is more than just a booklet; it’s your gateway to international adventures, a crucial identity document, and often, a necessity for various official purposes. In India, obtaining a passport involves a detailed process, and for those urgent travel plans or unexpected needs, securing an early appointment can be a game-changer. This comprehensive guide will walk you through everything you need to know, from booking that elusive early slot to understanding every step of the passport application journey.
FOR EARLY APPOINTMENT CHAT NOW
Disclaimer : The Fast Lane to Your Passport
This blog post is intended for informational purposes only and should not be considered legal advice. While we strive to provide accurate and up-to-date information, passport application procedures and requirements are subject to change by the Ministry of External Affairs, Government of India. Always refer to the official Passport Seva website (www.passportindia.gov.in) for the most current guidelines, forms, and fees. The author and publisher of this content will not be held responsible for any errors, omissions, or actions taken based on the information provided herein. It is strongly recommended to verify all details with official sources before proceeding with your passport application.
Part 1: How to Get an Early Passport Appointment in India (The “Need it Now” Guide)
Let’s face it, sometimes life throws a curveball, and you need a passport faster than the standard processing times allow. While there’s no magic wand, there are strategies to increase your chances of securing an earlier appointment.
1. Understanding Tatkaal Service: Your Express Option : The Fast Lane to Your Passport
The Tatkaal (Urgent) scheme is designed for applicants who require a passport on an urgent basis. It comes with a higher fee but significantly faster processing.
Key Features of Tatkaal: The Fast Lane to Your Passport
- Faster Processing: Tatkaal passports are typically dispatched within 1-3 working days after your PSK visit, provided all documents are in order and police verification (if any) is clear. This is in stark contrast to the 30-45 days a normal application might take.
- Post-Police Verification: Unlike normal applications where police verification often happens before passport dispatch, Tatkaal applications are processed under “post-police verification,” meaning your passport can be printed and dispatched before the police report is received.
- Higher Fees: Be prepared to pay a substantial additional fee for the Tatkaal service. You can check the exact fee on the Passport Seva website’s “Fee Calculator.”
- Eligibility: While most applicants are eligible, certain categories (e.g., those with criminal records, previous adverse police reports, or specific complex cases) might not be able to apply under Tatkaal. Always check the official instruction booklet for exclusions.
- No Gazetted Officer Verification Required: Previously, Tatkaal required a Verification Certificate from a Gazetted Officer. This requirement has been removed, simplifying the process.
How to Apply for Tatkaal: The Fast Lane to Your Passport
The online application process for Tatkaal is largely the same as a normal application, with one crucial difference: you select “Tatkaal” as your service type.
- Register/Login: Go to the Passport Seva Portal (www.passportindia.gov.in) and register as a new user or log in if you have an existing account.
- Select Application Type: Choose “Apply for Fresh Passport/Re-issue of Passport.”
- Choose Tatkaal: Crucially, select the “Tatkaal” option for the scheme type.
- Fill the Form: Complete the online application form accurately. Double-check all details to avoid rejections.
- Pay Fees Online: Online payment is mandatory for Tatkaal. Pay the applicable fees, which will include the Tatkaal surcharge.
- Schedule Appointment: After successful payment, the portal will allow you to schedule an appointment at your nearest Passport Seva Kendra (PSK) or Post Office Passport Seva Kendra (POPSK).
2. Hunting for Tatkaal Appointments: Strategies for Success
Tatkaal appointments are highly sought after and slots open up at specific times. Here’s how to maximize your chances:
- Know the Release Time: While there’s no officially fixed universal time, Tatkaal slots are often released in the mornings, typically between 11 AM to 12 PM (IST). This can vary by region and PSK. It’s a common practice to log in a few minutes before this window and keep refreshing.
- Be Fast and Prepared: The Fast Lane to Your Passport
- Login in advance: Log in to your Passport Seva account before the anticipated slot release time.
- Keep all details handy: Have your Application Reference Number (ARN), payment receipt, and desired PSK location ready.
- Fast Internet: A stable and fast internet connection is vital.
- Multiple Devices (Carefully): While not officially endorsed, some users try from multiple devices (e.g., laptop and mobile) simultaneously. However, ensure you’re not logging into the same account on multiple devices at the exact same moment as it might cause issues.
- Act Quickly: Slots disappear in seconds. Be ready to click and confirm as soon as they appear.
- Flexibility with PSK Location: If you’re in a metropolitan area with multiple PSKs or POPSKs, be flexible. Check appointment availability across all nearby centers. One PSK might have slots when others don’t.
- Check Frequently: Don’t just check at the “prime time.” Keep checking throughout the day, especially in the early mornings and late evenings. Sometimes, cancelled appointments or additional slots might open up unexpectedly.
- Weekends and Holidays: PSKs are generally closed on weekends and public holidays. Appointments are only available on working days (Monday to Friday, 9:30 AM to 4:30 PM, with token issuance until 4:00 PM).
- “Normal” Quota for Tatkaal Applicants: The Passport Seva system has “Normal” and “Tatkaal” appointment quotas. If you’re applying under Tatkaal but can’t find an early Tatkaal slot, you can consider booking an appointment under the “Normal” quota. However, you will still be charged the Tatkaal fee and your application will be processed under the Tatkaal scheme, benefiting from faster processing. This is a good fallback if you desperately need an early date but don’t mind the regular appointment wait for the actual PSK visit.
- Emergency/Medical Cases (Without Appointment): In genuine, extreme emergency/medical cases, you might be allowed to visit a Passport Seva Kendra without a prior appointment. However, this is entirely at the discretion of the Passport Seva Kendra In-charge/Passport Officer and requires strong, verifiable proof of urgency (e.g., medical certificates, death certificates, urgent travel advisories). This is not a guaranteed method and should only be considered as a last resort.
3. Rescheduling Your Passport Appointment : The Fast Lane to Your Passport
If you’ve already booked a normal appointment but now need an earlier one, you can reschedule.
Steps to Reschedule Online: The Fast Lane to Your Passport
- Login to Passport Seva Portal: Go to www.passportindia.gov.in and log in with your credentials.
- View Saved/Submitted Applications: Click on “View Saved/Submitted Applications.”
- Select Application: Select the application for which you want to reschedule the appointment.
- Schedule Appointment for Application Submission: Click on this option.
- Choose New Date/PSK: The portal will display available dates and time slots at various PSKs. Select a preferable date and location.
- Book Appointment: Confirm your new appointment.
Important Notes on Rescheduling: The Fast Lane to Your Passport
- Limited Reschedules: The Passport Seva system usually allows a limited number of reschedules (often two or three) within a certain period for a single ARN. Check the official guidelines.
- No Additional Fee (Usually): Generally, rescheduling an appointment online does not incur an additional fee unless you are changing from Normal to Tatkaal, in which case the Tatkaal fee applies.
- SMS Confirmation: You will receive an SMS with your new appointment details. This SMS is sufficient proof of your appointment; a printout of the application receipt is no longer strictly required, but it’s always good to have a copy.
Part 2: The Complete Indian Passport Application Process (Step-by-Step)
Whether you’re applying for a fresh passport or reissuing an old one, the process largely follows a standard set of steps.
Step 1: Online Registration and Application Form Filling : The Fast Lane to Your Passport
This is the very first and crucial step.
- Visit the Official Passport Seva Portal: Always use the official website: www.passportindia.gov.in. Be wary of unofficial websites or agents promising quick services, as they might be scams.
- Register as a New User: If you don’t have an account, click on “New User? Register Now.”
- Select your nearest Passport Office (based on your residential address).
- Enter your personal details (name, date of birth, email ID).
- Create a Login ID and password.
- A confirmation link will be sent to your registered email. Click on it to activate your account.
- Login to Your Account: Once registered, log in using your Login ID and password.
- Choose Application Type: The Fast Lane to Your Passport
- Click on “Apply for Fresh Passport/Re-issue of Passport.”
- Select the appropriate option: “Fresh Passport” or “Re-issue of Passport.”
- Choose the “Type of Application” (Normal or Tatkaal).
- Select the “Type of Booklet” (36 pages or 60 pages).
- Fill the Online Application Form: This form requires meticulous attention to detail.
- Applicant Details: Personal information, family details, address.
- Emergency Contact: Provide details of a person to be contacted in case of emergency.
- Previous Passport Details (for Re-issue): Provide your old passport number, date of issue, date of expiry, and place of issue.
- Other Details: Non-ECR category, criminal record declarations, etc.
- Accuracy is Key: Ensure all information matches your supporting documents precisely. Any discrepancies can lead to delays or rejection.
- Save Frequently: The portal allows you to save your application at various stages. Use this feature to avoid losing data.
- Print Application Form (Optional but Recommended): While not strictly mandatory to carry a printout of the ARN receipt to the PSK (SMS is accepted), it’s good practice to print the filled application form for your records and to double-check details. Note down your Application Reference Number (ARN).
Step 2: Online Payment and Appointment Scheduling
Online payment is mandatory to book an appointment at any PSK/POPSK. The Fast Lane to Your Passport
- Pay and Schedule Appointment: After submitting the online form, click on the “Pay and Schedule Appointment” link on the “View Saved/Submitted Applications” screen.
- Payment Method: You can pay using Credit/Debit Card, Net Banking, or UPI.
- Appointment Booking: The Fast Lane to Your Passport
- Once payment is successful, the system will display available appointment slots at various PSKs/POPSKs in your chosen Passport Office’s jurisdiction.
- Select a convenient date and time slot at your preferred PSK/POPSK.
- Confirm the appointment.
- Print Application Receipt: After successfully booking the appointment, you can print the application receipt which contains your ARN and appointment details. You will also receive an SMS with your appointment details.
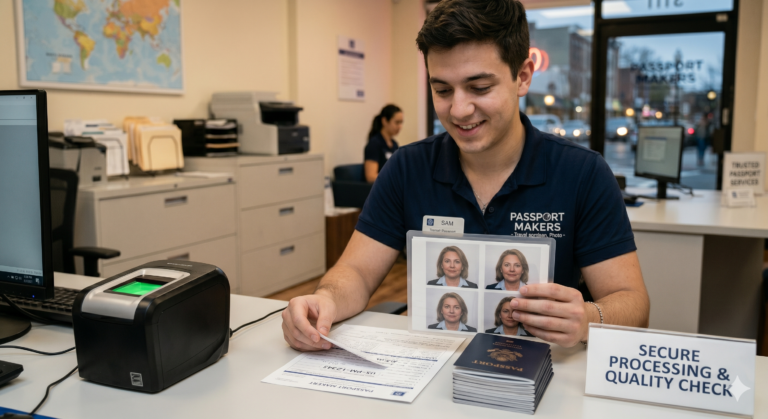
Step 3: Visiting the Passport Seva Kendra (PSK) / Post Office Passport Seva Kendra (POPSK)
This is where your physical documents are verified and biometrics are captured. The Fast Lane to Your Passport
- Arrive Early: Reach the PSK/POPSK at least 15-30 minutes before your scheduled appointment time. This allows for security checks and finding your way.
- Documents to Carry: This is the most critical part. Carry all original documents and self-attested photocopies of each. Missing even one document can lead to your application being put on hold or rejected, requiring a new appointment.Essential Documents for Most Applicants (Fresh Passport – Adult):
- Proof of Add
- ress (any one of the following):
- Aadhaar CardVoter ID CardElectricity Bill (current address, not older than 3 months)Water Bill (current address, not older than 3 months)Telephone Bill (landline or post-paid mobile bill, not older than 3 months)Gas Connection BillBank Account Passbook (photo of the first page with address and account details)Rent Agreement (if living on rent, registered one)Income Tax Assessment OrderSpouse’s passport copy (first and last page with applicant’s name as spouse)Certificate from Employer of reputed companies on letterhead (for some categories)
- Birth Certificate issued by Municipal Authority or Registrar of Births & Deaths.PAN Card with DOB.Aadhaar Card/E-Aadhaar with DOB.Driving License with DOB.School Leaving Certificate/Matriculation Certificate.Policy Bond issued by the Public Life Insurance Corporations/Organizations (containing DOB).
- PAN Card.Voter ID Card.Driving License.Aadhaar Card.
- For Re-issue of Passport: The Fast Lane to Your Passport
- Original Old Passport.
- Self-attested copies of the first two and last two pages of the old passport, including ECR/Non-ECR page and any observation pages.
- If lost/damaged passport: Police report (FIR), a sworn affidavit in the prescribed format, and photocopy of lost/damaged passport (if available).
- For Minors (below 18 years): The Fast Lane to Your Passport
- Minor’s Birth Certificate.
- Proof of Address (in parents’ name).
- Parents’ Passports (original and self-attested copies).
- Annexure ‘D’ (Consent of both parents/legal guardians).
- Annexure ‘C’ (for minors between 15-18 years who want a 10-year validity passport).
- Both parents MUST be present at the PSK. If one parent is absent, a notarized affidavit (Annexure C or G, depending on the reason) is required. The Fast Lane to Your Passport
- For Government Employees: No Objection Certificate (NOC) / Prior Intimation Letter (PI) as per Annexure G/H.
- For Name Change/Correction: Original newspaper clippings (two leading daily newspapers), marriage certificate (for post-marriage name change), divorce decree, etc.
- Non-ECR (Emigration Check Required) Status: To obtain non-ECR status, generally, you need to have passed 10th standard or possess a professional degree. Provide relevant certificates.
- Annexures: Various affidavits (Annexure E, F, G, H, I, etc.) may be required depending on your specific case (e.g., lost passport, change of name, single parent, adopted child). Download the correct annexures from the Passport Seva website, fill them, and get them notarized if required.
- At the PSK: The Fast Lane to Your Passport
- Token Counter: Show your ARN receipt/SMS and original documents. You’ll get a token number.
- A Counters: Your documents will be initially verified, and your photograph and fingerprints will be captured.
- B Counters: Further document verification and scanning will be done.
- C Counters (Granting Officer): The final decision on your application will be made by the Passport Officer. They may ask additional questions or request further documents.
Step 4: Police Verification (PV) The Fast Lane to Your Passport
Police verification is a mandatory step for almost all fresh passport applications and some re-issue cases.
- Process: After your PSK visit, your application will be sent for police verification. A police official from your local police station will visit your residential address to verify the details provided in your application. They might ask for original documents as proof of identity and address.
- Prompt Cooperation: Cooperate fully with the police official. Provide all requested documents. Delays in police verification can significantly prolong the passport issuance process.
- Verification Status: You will receive SMS updates regarding the status of your police verification. You can also track it online.
- Types of PV: The Fast Lane to Your Passport
- Pre-Police Verification: Common for normal applications, where PV happens before passport dispatch.
- Post-Police Verification: Common for Tatkaal applications, where the passport is dispatched first, and PV happens afterward. If the PV report is adverse, the passport can be revoked.
Step 5: Passport Dispatch and Delivery The Fast Lane to Your Passport
Once your application is granted by the Passport Officer and police verification (if pre-PV) is complete, your passport will be printed and dispatched.
- SMS Updates: You will receive SMS notifications about your passport’s printing and dispatch status.
- Tracking: You can track the delivery status of your passport online using your ARN on the Passport Seva Portal.
- Delivery Time: The Fast Lane to Your Passport
- Tatkaal: Typically 1-3 working days after PSK visit (if granted).
- Normal: Can take 30-45 days, depending on police verification and regional processing times.
- Receive Your Passport: Your passport will be delivered to your registered address via Speed Post or registered courier service. Ensure someone is available to receive it.
Step 6: Checking Application Status : The Fast Lane to Your Passport
Throughout the entire process, you can constantly monitor your application’s status.
- Visit Passport Seva Portal: www.passportindia.gov.in
- Track Application Status: Click on “Track Application Status.”
- Enter Details: Select the application type and enter your ARN and Date of Birth.
- View Status: The system will display the current status of your application (e.g., “Application Submitted,” “Police Verification Initiated,” “Passport Printed,” “Passport Dispatched”).
Important Tips for a Smooth Passport Application Process
- Read the Instruction Booklet: Before you even start, download and thoroughly read the official instruction booklet from the Passport Seva website. It contains detailed information on eligibility, required documents, and specific scenarios.
- Gather All Documents: The most common reason for application delays or rejections is incomplete or incorrect documentation. Prepare all originals and self-attested photocopies well in advance.
- Accuracy is Paramount: Double-check every single detail you enter in the online form and on your documents. Even minor discrepancies (e.g., spelling mistakes, incorrect dates) can cause significant problems.
- Passport Size Photos: Although they take your photo at the PSK, ensure you have two recent, white-background passport-sized photos meeting the specifications, just in case. The Fast Lane to Your Passport
- Be Patient: While Tatkaal speeds things up, the normal process can be lengthy. Avoid making non-refundable travel plans until you have your passport in hand. The Fast Lane to Your Passport
- Keep ARN Safe: Your Application Reference Number (ARN) is crucial for tracking your application and for any future communication with the Passport Seva Kendra. The Fast Lane to Your Passport
- Beware of Agents: While there are authorized agencies that assist with form filling, be cautious of unauthorized “agents” who promise to expedite the process through illegal means. Stick to the official channels.
- Stay Updated: Check the Passport Seva website regularly for any announcements, changes in rules, or holiday schedules that might affect processing times. The Fast Lane to Your Passport
- Helpline: If you have queries, utilize the Passport Seva National Call Centre (1800-258-1800) or their online grievance redressal system. The Fast Lane to Your Passport
Obtaining an Indian passport is a streamlined process thanks to the Passport Seva project. By understanding the steps, preparing diligently, and utilizing the available options like Tatkaal, you can navigate the application journey efficiently and get your hands on that coveted travel document sooner rather than later. Happy travels! The Fast Lane to Your Passport